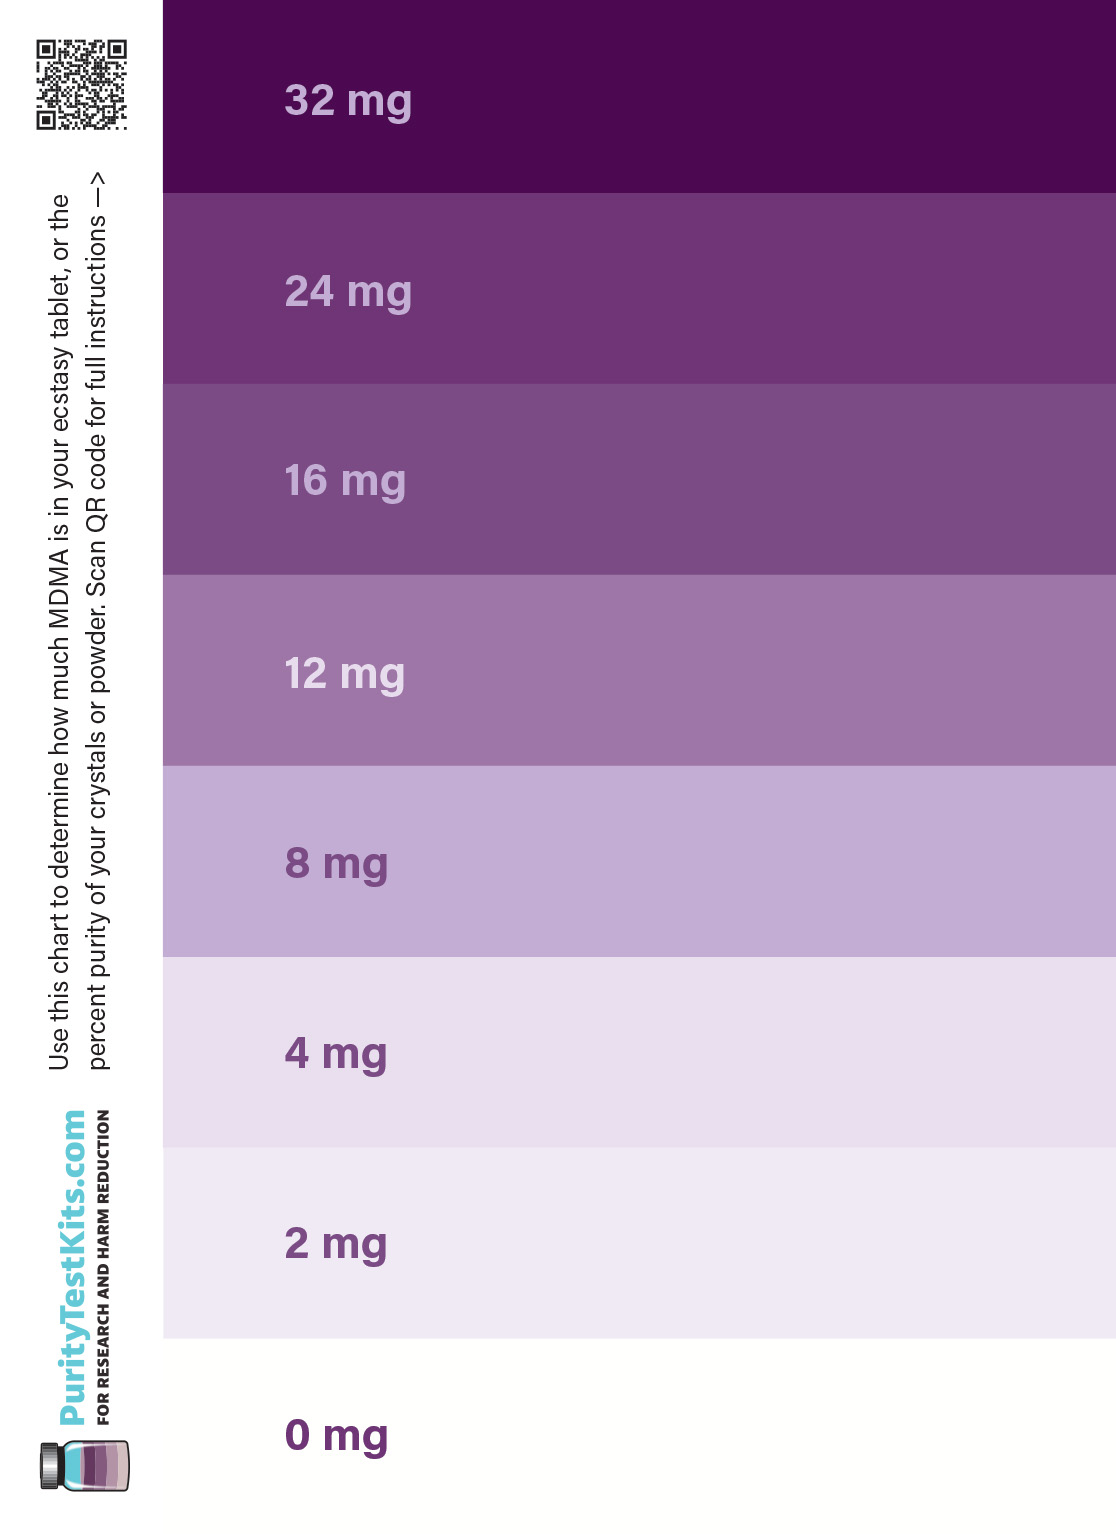
Description
Important chemical safety
This kit contains a sulfuric-acid reagent that can cause severe skin and eye burns. Wear the supplied nitrile gloves and appropriate eye protection, remove contact lenses before testing, and keep the kit away from children and pets.
If a liquid contacts skin or eyes, flush immediately with water and contact Poison Control at 1-800-222-1222 in the United States. Poison Control is free, confidential, and available 24/7. Seek emergency medical care for severe symptoms or injury.
If your kit includes heptane, use it in a well-ventilated area away from flames, sparks, smoking, and other ignition sources. Heptane is volatile and highly flammable.
How does the kit work?
This is just a basic outline. Scroll down for the full instructions.
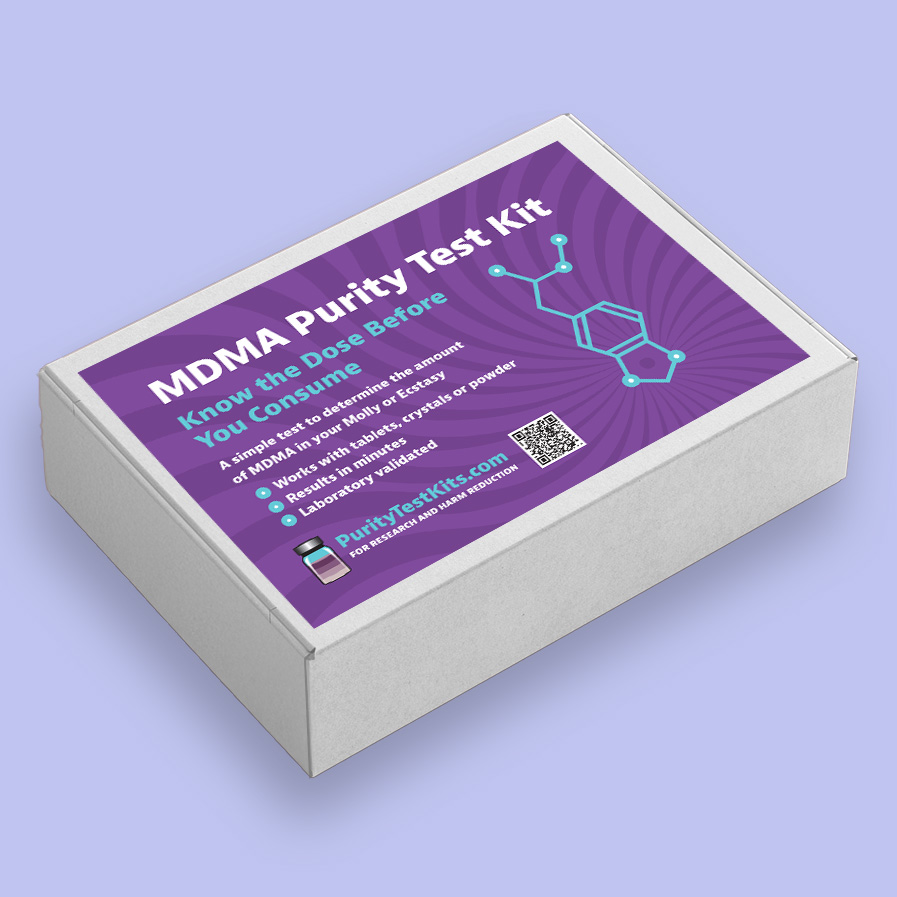
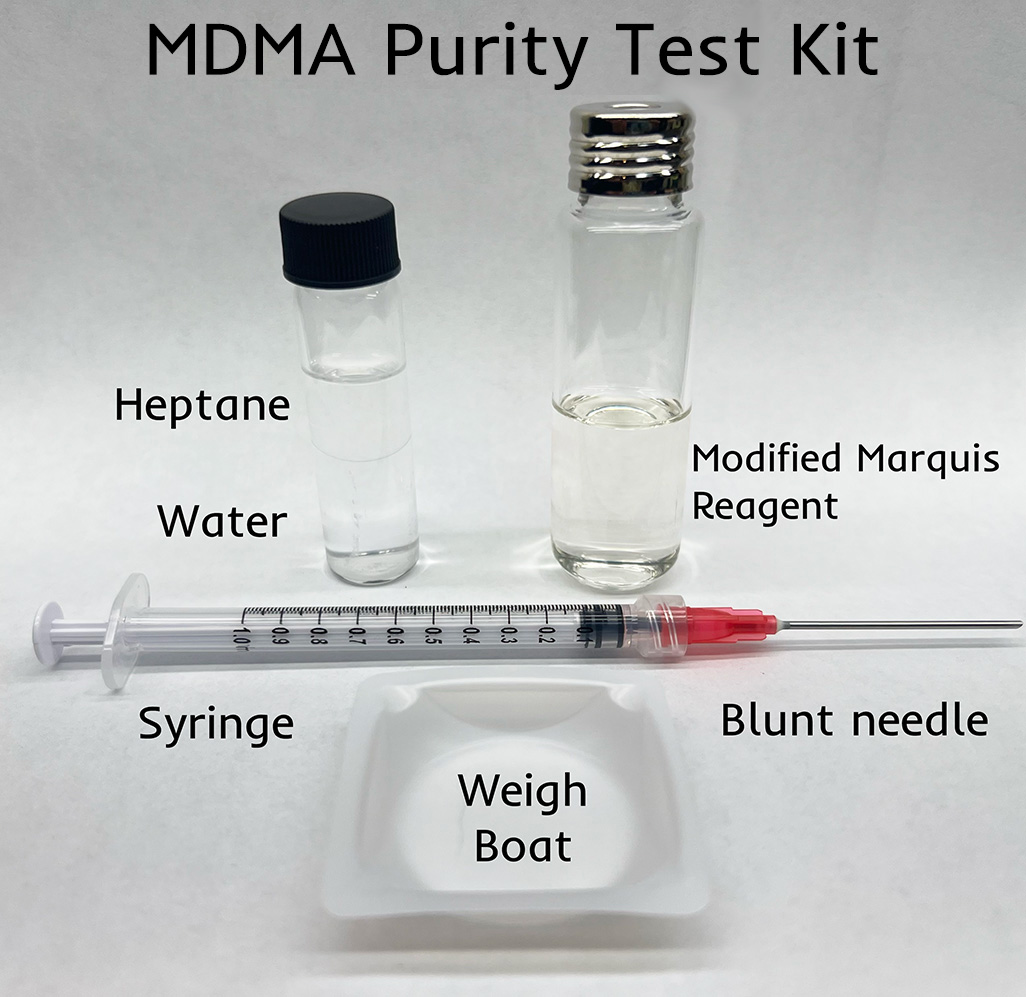
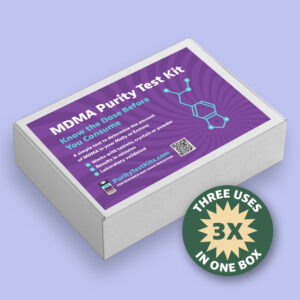
The MDMA purity test kit from PurityTestKits.com uses a modified Marquis reagent. The extraction fluid is simply distilled water with optional heptane added if you’re testing an ecstasy tablet. (The heptane floats on top and traps dyes used in ecstasy tablets, leaving the MDMA diluted in the water below.)
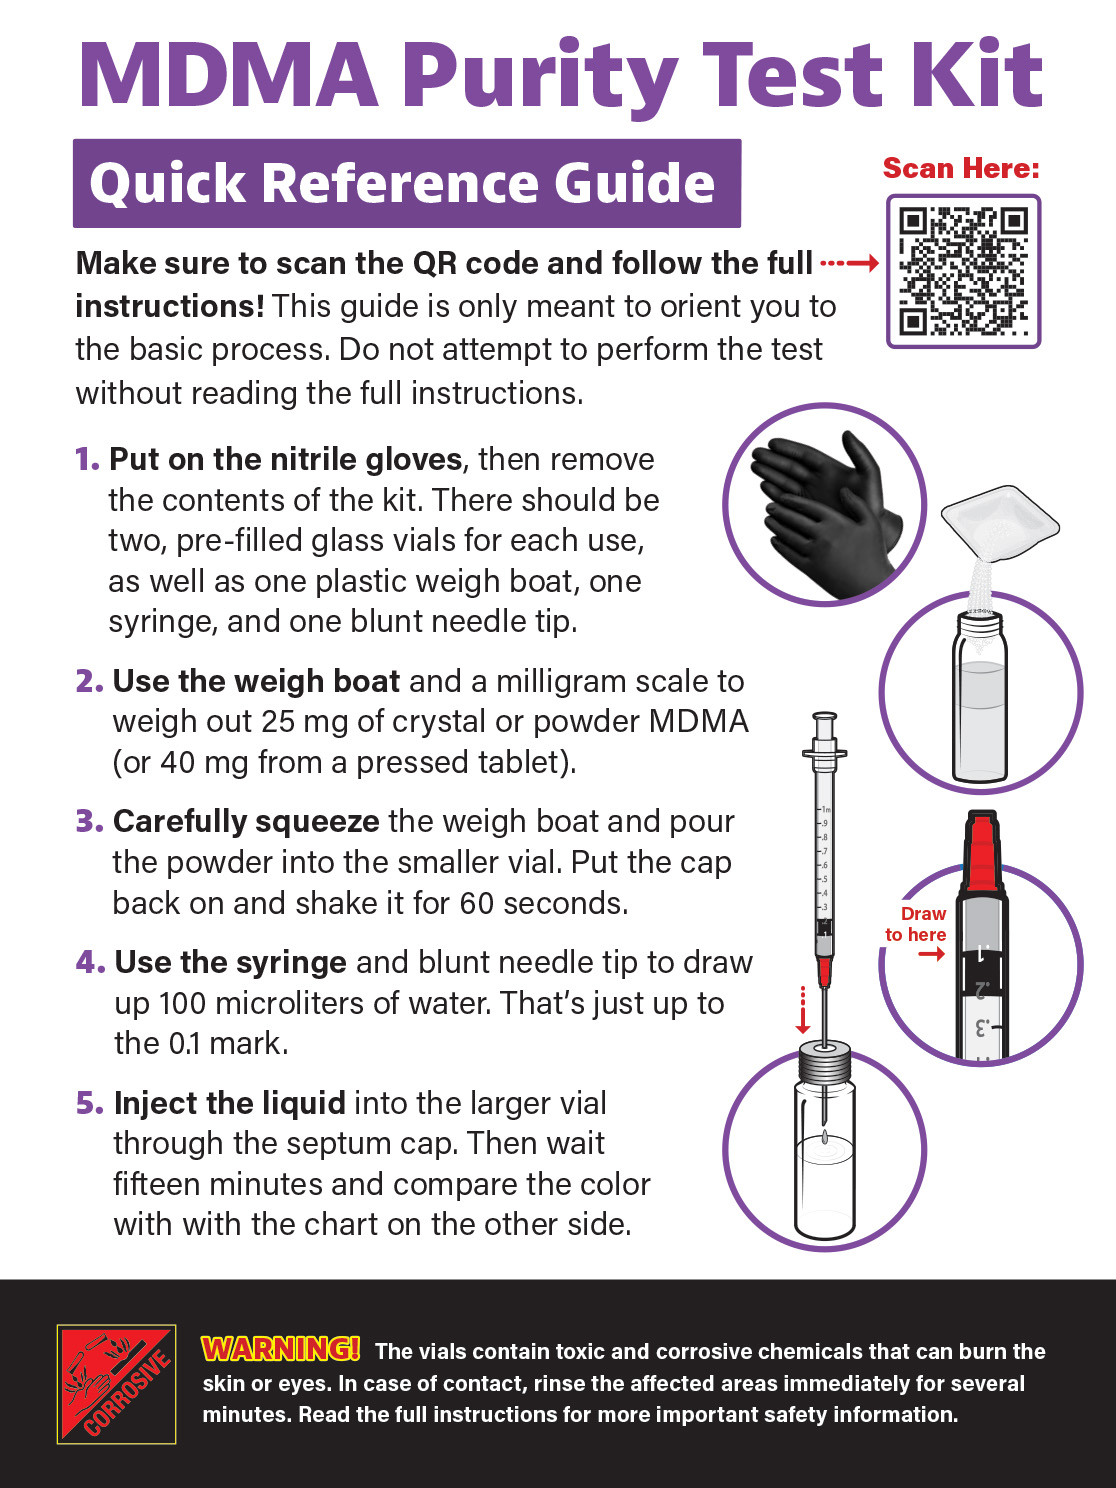
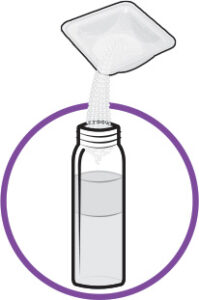 Weigh out 25 mg of your powder or crystal MDMA (or 40 mg from a pressed ecstasy tablet) and put it in the extraction vial. Shake it up until it is completely dissolved.
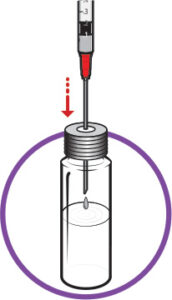 Now use the syringe and draw up exactly 0.1 mL of the MDMA liquid. Inject this into the reaction vial through the septum, then wait fifteen minutes and compare the color of the liquid to the enclosed color chart.
What do the colors look like?
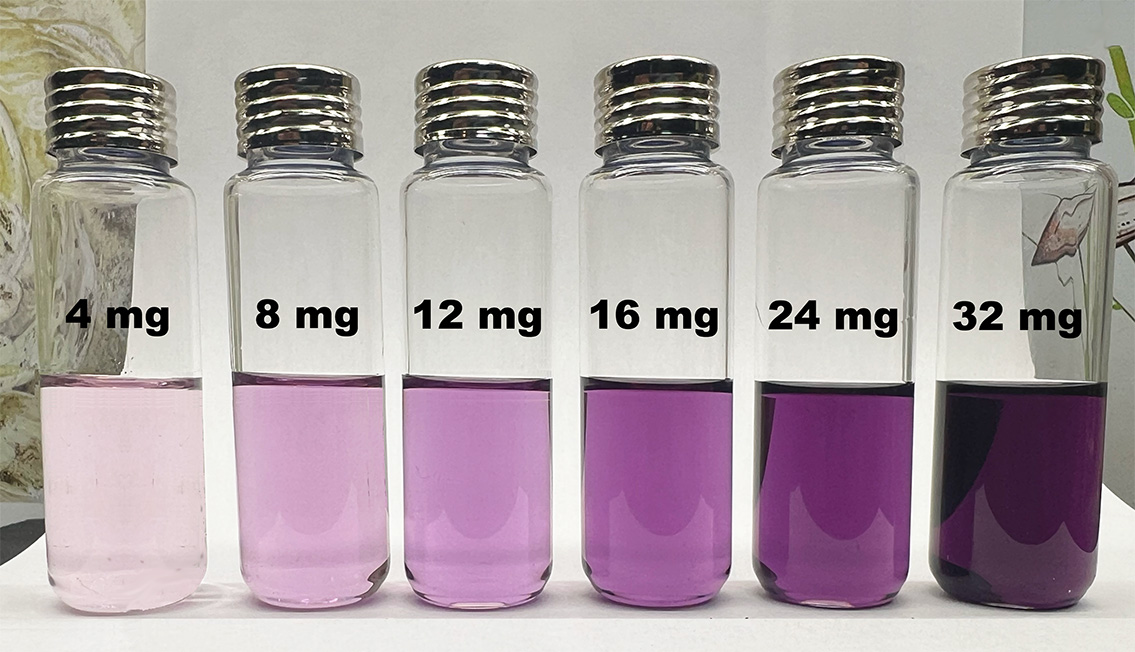
Here’s an image showing the colors of the liquid with specific amounts of MDMA. This image was taken under a bright, full spectrum light with a white piece of paper behind the vials. You’ll need to evaluate your result similarly, either with a full spectrum light or in daylight. Use the printed color chart that comes with your kit. Do not try to evaluate the result on your phone or computer screen using this image. All screens render colors differently.
MDMA Purity Test Kit Instructions
SAFETY INFORMATION: READ THIS FIRST!
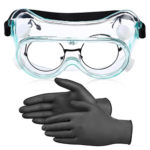 1. The larger vial with the septum cap contains sulfuric acid, which can severely burn the skin and eyes. The smaller vial sometimes contains heptane (if you selected it), which can also irritate the skin and eyes. So put on the nitrile gloves and remove any contact lenses. We also recommend wearing safety goggles. Accidents can happen at any time, so safety first!
2. Should any liquids make contact with your skin, rinse the affected area with water for several minutes. If liquid gets in your eyes, immediately rinse with water for several minutes keeping your upper and lower eyelids open.
3. Store the kit away from children, and lock up your pets (especially cats) before performing the test.
4. If you ordered the kit containing heptane (for ecstasy tablets), perform the test in a well-ventilated area. Heptane is a relatively safe solvent but inhaling too many fumes of any solvent isn’t good for you. It’s also flammable, so don’t smoke while performing the test!
5. When the test is over, follow the instructions below for disposing of the liquids. DO NOT simply throw the vials in the trash with the liquid inside.
SOME IMPORTANT THINGS TO KNOW
1. Make sure you have MDMA before using the kit. Other drugs can produce a similar purple reaction. Use standard reagents to confirm you have MDMA first.
2. Use the MDMA purity test kit at room temperature. If stored in a refrigerator, let it warm up for one hour.
3. Perform the test during the day or else you need a very bright, full spectrum overhead light. You will also need a white piece of paper.
4. Some people see colors differently than the average person. So it’s always best to have a few other people evaluate the result with you.
5. Read all the instructions at least once through before beginning the test. You need to evaluate the result between fifteen and twenty minutes after color development begins. You don’t want to be frantically reading the instructions during the development time.
STEP 1: WEIGH YOUR MDMA
1. Put the weigh boat on a milligram scale and weigh out 25 mg of crushed MDMA crystals or powder.
2. If you’re testing an ecstasy tablet, weigh the entire tablet first and write down the result. Then crush some of it up into a fine powder and weigh out 40 mg (instead of 25).
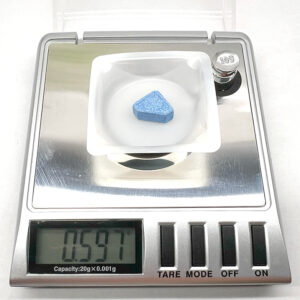
If testing an ecstasy tablet, weigh the entire tablet first and write down the result.
STEP 2: DISSOLVE THE MDMA IN WATER
1. Squeeze the weigh boat and pour the MDMA into the smaller vial with the black cap containing water. For ecstasy tablets, the vial will also have heptane floating above the water. (You chose the option before purchasing.)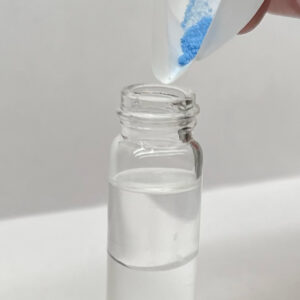
Squeeze the weigh boat diagonally while pouring.
2. Put the cap back on the vial and shake it vigorously until the powder or crystals are completely dissolved. This could take a few minutes, especially if there are large chunks. Look at the bottom of the vial. If you see anything, keep shaking.
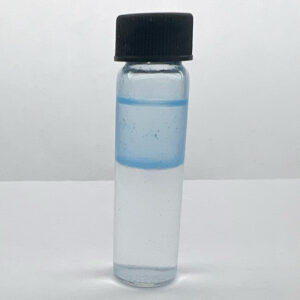
The dye from ecstasy tablets will remain suspended in the heptane above. The MDMA will dissolve into the water below.
STEP 3: DRAW UP SOME WATER INTO THE SYRINGE
Screw the blunt tip needle onto the syringe and then push it down into the vial well past the heptane. Now carefully draw up about 0.3 mL of the water. You don’t need very much. The syringe should only be about one-third full.
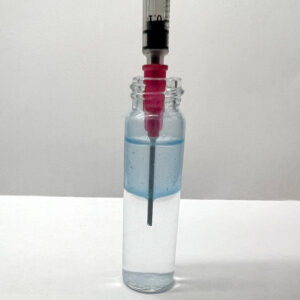
The needle should be slightly lower than shown here, just to make sure you don’t accidentally draw up heptane.
STEP 4: PREPARE THE SYRINGE
This is an important step. You need to get any air, including any bubbles, out of the syringe and then push out some of the water so you have exactly 0.1 mL left. Here’s how to do it.
1. First, turn the syringe so the needle is pointing up, then tap or flick the syringe to get any air to float to the top. (Yes, just like you see in the movies.)
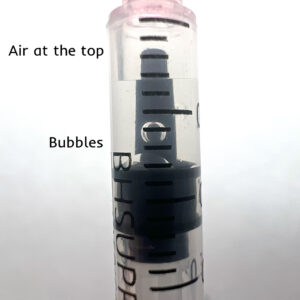
If you aspirated the syringe as described in the blue section above, you may not have any air in the syringe at all. Otherwise, you will have air and perhaps some bubbles. Just keep tapping until it all floats to the top.
2. Now gently push the plunger up to eject the air out of the syringe, and then push some of the water out until you have exactly 0.1 mL left. Water will drip down the side of the syringe. That’s ok. You’re wearing gloves. Plus, it’s just water with MDMA in it. (Do not touch or ingest the liquid. Residual heptane may remain on the needle.)
Pay attention so that the 0.1 mL line on the barrel of the syringe is lined up with the top of the base of the plunger.
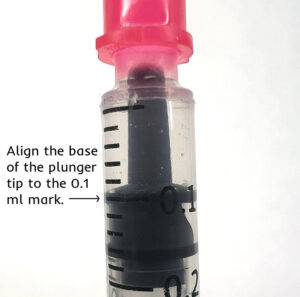
STEP 5: INJECT THE WATER INTO THE REACTION VIAL
1. Poke the needle through the septum on top of the reaction vial, and push the liquid in. The vial will become slightly warm.
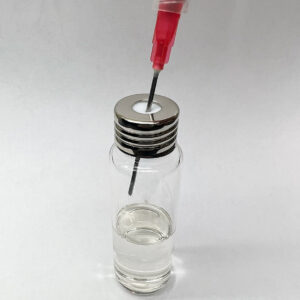
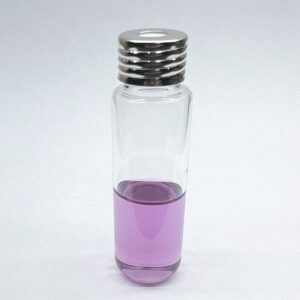
2. Remove the needle and shake the vial for a few seconds to mix the MDMA water with the Marquis reagent. The color should slowly start to turn purple.
3. Set your timer for 15 minutes.
STEP 6: EVALUATE THE RESULT
1. Wait a full fifteen minutes before comparing the color to the color chart, but don’t wait much longer than that. The color will keep on darkening over time. The window between 15 and 20 minutes will give an accurate result.
2. In daylight or under a very bright full spectrum light, hold the reaction vial next to the color chart. You should also hold a white piece of paper about six to eight inches behind the vial. (Yes, we realize this requires three hands. So have someone help you.)
3. Compare the color of the liquid in the vial to the color chart. The color bars on the chart correspond to the amount of MDMA tested.
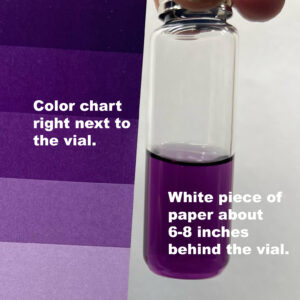
4. If you tested 25 mg of crystals or powder and the color looks about 20 mg according to the chart, you know that your sample is approximately 80% pure (i.e., it contains 20 mg of MDMA for every 25 mg of powder/crystal.)
5. If you tested 40 mg from an ecstasy tablet, divide the total weight of the original tablet by 40 and then multiply that by the color chart result. This calculation estimates how many milligrams of MDMA were in the original tablet. For example, if the tablet weighed 400 mg and the tested 40 mg portion showed 16 mg of MDMA, the estimated total is 160 mg (400 ÷ 40 = 10; 10 × 16 = 160).
6. If the kit does not turn purple at all, it either contains no MDMA or an amount below the detection limit.
STEP 7: DISPOSING OF THE LIQUIDS
This is an important step. We’re going to explain how to safely and legally dispose of the chemicals. It’s not difficult, so please follow the instructions.
1. Concerning the reaction vial, DO NOT pour it directly down the drain. You need to dilute the Marquis reagent in water first as described below. Alternatively, you can store the vial in an empty, dry, plastic container (like a water bottle, yogurt container or milk jug) and take it to your local hazardous waste disposal site. Just make sure the plastic container you store it in is dry, because once you’ve punctured the septum cap the reagent might leak out over time and react with liquids.
2. To safely dilute the reagent, fill a bucket or large container with a gallon of water and go outside.
3. Once outside, put on the nitrile gloves and safety goggles.
4. Unscrew the aluminum septum cap from the reaction vial and slowly pour the Marquis reagent into the water, holding the vial a few inches from the surface of the water. If you pour it from too high above, the acid can splash up and hit you.
5. Once you have poured out all the Marquis reagent, put the cap back on the vial and throw it in the trash.
6. Now you can pour the bucket of water down the drain safely. Do not pour it on the ground.
7. Concerning the extraction vial, if it only contains water, just pour it down the drain. If you ordered one with water and heptane, DO NOT pour it down the drain or onto the ground. Rather, go outside and pour it into the small cup of vermiculite we sent you. Let it evaporate for 30 minutes, then put the lid on it and store it with your old paint containers and other items you will eventually bring to a hazardous waste disposal site.
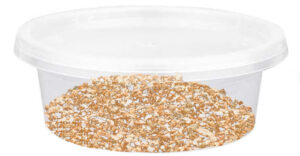
Use the cup with vermiculite to dispose of the water and heptane in the extraction vial.
STORAGE AND SHELF LIFE
Store the MDMA purity test kit at room temperature. Follow the expiration date and storage instructions supplied with the kit. Always store it out of reach of children.
DISCLAIMERS
1. The kit can only tell you the amount of MDMA in your sample. The sample may still be adulterated with one or more other substances.
2. The result does not mean your sample is safe to consume. No drug use is 100% safe.
3. PurityTestKits.com and HRDS LLC assume no responsibility for the use or misuse of the test kit or the results.
Product information and instructions adapted with permission from Grassroots Harm Reduction and the kit manufacturer. Chemical-hazard references: CDC/NIOSH Sulfuric Acid guidance and Poison Control.
Reviews
There are no reviews yet.